How to Check your Oxygen Saturation using the ChoiceMMed SPO2 Monitor
Step-by-step instructions to check your SPO2 using the ChoiceMMed SPO2 monitor connected to the aTouchAway® App.
Your ChoiceMMed SPO2 monitor should already have been paired to your tablet by your healthcare provider. These instructions will show you how to respond to the tablet when you receive instructions to check your oxygen levels and pulse.
Clicking Done will advance to the next step in the process.

You will see the following screen pop up on your tablet. We recommend choosing Read from device paired with Aetonix.
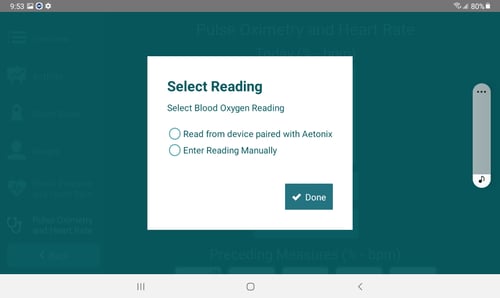
Touch Read from device to continue.
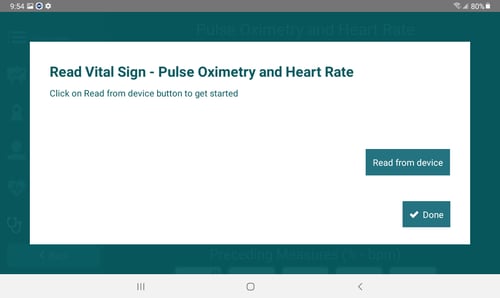
Put the SPO2 device on your finger. Your fingertip should be in as far as possible, with your fingernail and the device screen facing up. Keep your hand steady. Resting it gently on a surface may be helpful. Once the reading has appeared on the screen and is steady, touch the Ok button on the tablet screen. Your pulse reading and oxygen levels may fluctuate slightly as you're taking your reading. This is acceptable. Do not remove the device from your finger until the tablet has finished reading from the device.
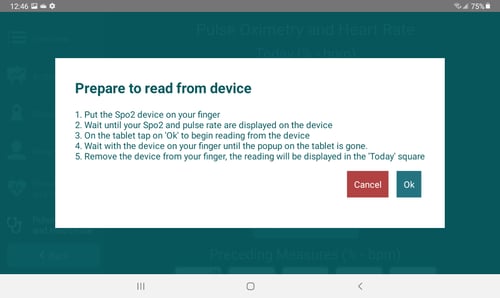
Once you've touched the Ok button, the tablet will connect to your device to capture the reading.
.jpg?width=500&name=Scanning%20for%20device%20(generic).jpg)
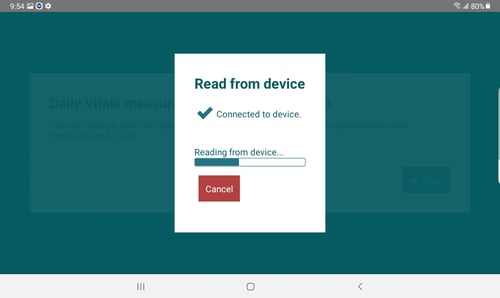
The data will be uploaded to the next screen. If the data presented doesn't look like what you were seeing on the device, you can touch Here on the screen to redo the reading. You will go through this entire sequence again.
If the data present looks correct, touch Done to complete the reading.
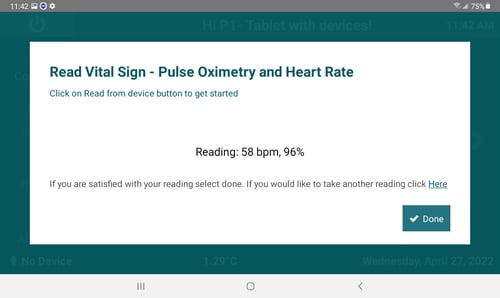
If you cannot connect the device to the tablet to complete this, touch Here on the last screen and start the process again but select Enter Reading Manually to enter the numbers you see on your SPO2 device.

Would you like to print these instructions? Click here to download a printable PDF
Do you have a different SPO2 device? You'll find specific instructions here:
The Fora® TNG SPO2 meter