To access the patient's profile page, click a patient's name in Your Managed Patients list. See My Managed Patients for more detailed instructions.
Communication and Actions
Each managed patient will have their own patient's profile page in the Patient Manager's aTouchAway® App. The patient profile page is divided into different sections. The top section (dark green) will have communication tools including messaging and calling functions. These functions are described in detail in these articles:
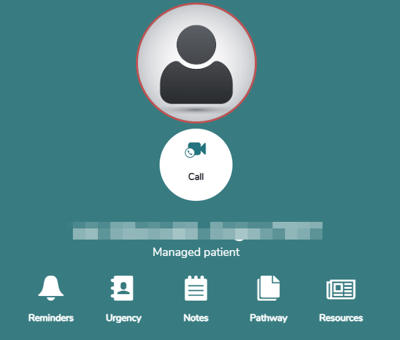
Reminders can be set for patients. See more in Reminders.
Urgency Calling can be set up for patients at risk who may need to contact their medical team. Please note that this is NOT a 911 service; it is to enable an Urgency Call button on the patient's tablet that will initiate a call to the selected staff members you configure in that page.
Notes can be added to the patient's chart at any time. These notes are visible in the aTouchAway® Dashboards' Health Overview and Patient Overview pages.
The Pathway menu will allow you to start, stop or view a current Care Pathway. Any Care Pathway that is available to your organization can be configured and started here. The Care Pathway start page options will vary depending on the Care Pathway.
The Resources section allows you to enable and disable access to educational materials for your patients. Some educational materials may be added by the Care Pathway automatically on start. When items already appear on the list when opened, this means there are resources the Pathway has already provided for the patient to have access to.
If you have permissions to change access to resources, you will be able to click Edit and select/deselect any items you may want to change access to.

When making changes, make sure to scroll to the bottom of the page and click Save. The patient will see the changes immediately.

Status & Health
As you scroll to the white section of the patient's profile page, you will notice that the icons are arranged according to different functions.
The top icon(s) reflect a patient's current risk level. Based on predetermined thresholds, any data that is collected from the patient from their pathway(s) will be reflected in their Status. Green means the patient is normal based on specified thresholds, yellow is low risk, and red is high risk. This status is also reflected on the manager's Home page. The background colour for each patient's name in the Your Managed Patients list will reflect the status found here.

The Health section will contain any vital signs and other metrics collected through the app. The Overview will show you the latest values collected, and the individual vital sign views will contain all readings collected.
Forms & Utilities

The Forms section will contain all the forms that are active in the patient's pathway(s). They can be viewed or accessed here.
Utilities
The functions in this section allow you to control the settings in your patient's aTouchAway® App.
Personal Information: Manage your patient's personal information, including uploading a photo for easier recognition. You can switch your patient's account from metric to imperial (or vice-versa), set the app language, and adjust the privacy settings for contact searches.
Contacts: Add contacts to your patient's account here. To be able to communicate with anyone over text or call, they must be contacts. See Setting up Contacts for communication.
Care Team: View and Manage the care team and their permissions from this button. See How to set Manager Permissions.
Bluetooth Devices: When setting up the aTouchAway® tablet for a patient, Bluetooth devices can be paired using the functions here. See Setting up the aTouchAway® Tablet using the App.
aTouchAway settings: This section controls what the patient can see in their app. You can:
- choose the number of contacts visible per page
- change what the power button on the app does
- select screensaver settings
- adjust the Messaging level (beginner, intermediate, advanced)
- adjust the size of the font
This is where the app is truly customizable for each patient.
For patients to be able to see Resources and Forms, they must be enabled in this section. For Health data to be collected, the specific settings must be enabled through this page.
Bracelet Settings: If your patient has a monitoring bracelet that captures steps or wandering, the settings will be found here. For more information, refer to Configuring Bracelet Settings
Stop Managing: You can remove yourself as a patient manager using this button. This will not stop pathways or deactivate a patient account; it will simply remove you as their manager. To deactivate a patient account, see the Patient Discharge Guide.