How to Set Up Patient Messaging
How to set up and select messaging/chat features for the patients you manage. You must be a patient contact in order to chat/message directly with them.
The aTouchAway® solution provides the option to send text messages to patients that have aTouchAway® tablets. This is set up with a few easy steps on the aTouchAway® App, and you can also choose which setting you would like to use for patients.
Only contacts are able to message patients. You will need to start by setting yourself up as a patient contact.
How to add yourself as a Contact:
1. Under the Your Managed Patients list, go to the patient profile for whom you would like to set up messaging.
2. In the Utilities section, click on Contacts. Click +Invite a new contact and enter your email address. Click on your name or +Send Request.


Levels of Permission - Messaging
There are three levels of permission that can be granted for messaging:
- Beginner: The patient will see the message displayed in your contact photo on their tablet screen. They can’t respond.
- Intermediate: The patient will see there’s a new message in your contact photo on their tablet. They can click on that notification and have options to “Acknowledge” or “Cancel” the message. When they click "Acknowledge", you will see a “read” indicator in your message to them.
- Advanced: The patient will see the “Messaging” menu on the left-hand side and will be able to respond and initiate a message to their contacts. This option is recommended for more tech-savvy patients.

Any users on their own personal devices (BYOD) will automatically have Advanced settings. This cannot be changed.
How to Choose the Messaging Level
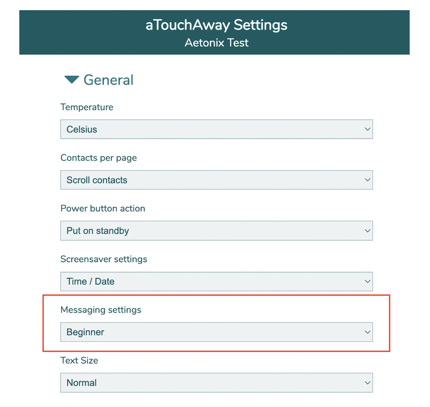
To configure the messaging level setting, under the patient's account in your aTouchAway® App, scroll down to Utilities and select aTouchAway settings.

Select the messaging setting you prefer for this patient. Click Save.
