Configuring Bracelet Settings using the aTouchAway® App
A step-by-step guide for bracelet settings using the aTouchAway® App.
As of September 1, 2025, this device is no longer supported by Aetonix®.
In order to have access to the Bracelet Settings button, ensure that:
a) the Patient Group's Device Preferences Permission has been enabled (OR)
b) the Patient Manager's individual Device Preferences Permission has been enabled

For more information on setting permissions, please see:
Step 1: Open the Patient’s Homepage on the Manager’s aTouchAway® App
On the Patient Manager's aTouchAway® App, find the patient's name in the Your Managed Patients section of the aTouchAway® App.

The Patient Manager will likely need to choose the appropriate Patient Group from the dropdown list to find the patient's name.
Step 2: Open Bracelet Settings
On the patient’s homepage in the aTouchAway® App, scroll down to the Utilities section. Click Bracelet Settings.

Step 3: Configuring the Bracelet Settings
Organization Configuration
Each organization will need to configure the proper settings for each patient using a bracelet.
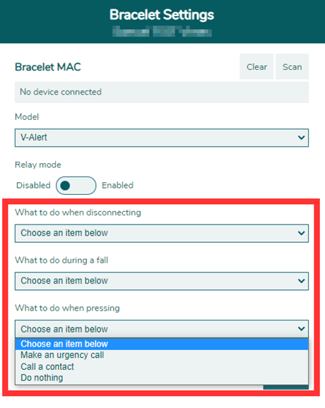
On the patient’s Bracelet Settings page, settings for each of the following are available:
- What to do when disconnecting
- What to do during a fall
- What to do when pressing
To configure, choose an option from each applicable dropdown list. Click Save.
A care coordinator must be selected to monitor these functions.
Bracelet Functionality
There are 4 ways that the bracelet can be used:
- fall detection
- call button
- accepting video calls
- wandering
Fall Detection
For a bracelet to detect a fall:
- the fall must be from 2.5 feet or higher
- the fall must occur quickly
- if the fall occurs gradually (for example sliding down against a wall), the bracelet will not detect the fall (patient can still press the button for help)
- the bracelet must be connected to the tablet
- the bracelet remains connected up to approximately 75 feet from the tablet via Bluetooth
- walls, floors, and other obstructions may reduce the distance within which the tablet and bracelet remain connected
- the bracelet remains connected up to approximately 75 feet from the tablet via Bluetooth
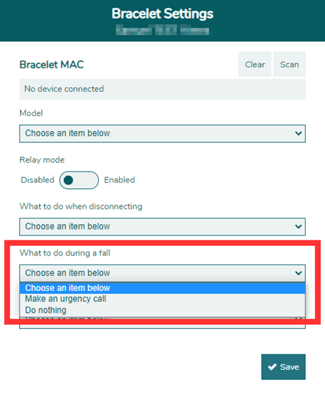
To set up the fall action to trigger an urgency call:
Click on the dropdown menu below What to do during a fall.
Select Make an urgency call.
Click Save.
If a fall is detected:
- the bracelet will flash red
- if the bracelet is connected to the tablet, the tablet will begin a 60 second countdown
- if the countdown is not stopped within 60 seconds, the app will move to the next step
- if the bracelet is connected to the tablet and at least one contact has been added to the urgency call list, an urgency call will be triggered
- the call will cycle through all contacts in the urgency call list nonstop until a call is answered or the urgency call is cancelled on the tablet
- if a call is not answered within 20 seconds, the system will move to the next person on the list and cycle through the list nonstop
- one of the following must occur for the urgency call to stop
- the urgency call must be answered in video
- the urgency call must be cancelled on the tablet
- the call will cycle through all contacts in the urgency call list nonstop until a call is answered or the urgency call is cancelled on the tablet
Call Button
Pressing the button on the bracelet can be set to trigger an urgency call. This functionality is normally used in multi-patient centres.
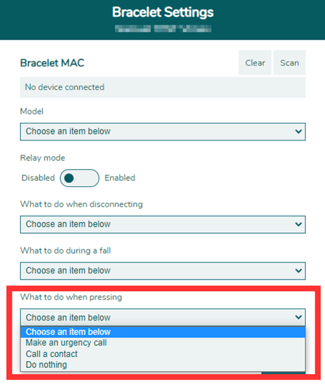
To set up the call button to trigger an urgency call:
Click on the dropdown menu below What to do when pressing.
Select Make an urgency call.
Click Save.
Pressing the button will trigger an urgency call:
- if the bracelet is connected to the tablet and at least one contact has been added to the urgency call list
- the call will cycle through all contacts in the urgency call list nonstop until the call is answered or cancelled
- if a call is not answered within 20 seconds, the system will call the next person on the list
- one of the following must occur for the urgency call to stop
- the urgency call must be answered in video
- the urgency call must be cancelled on the tablet
- the call will cycle through all contacts in the urgency call list nonstop until the call is answered or cancelled
Launching Video Calls
The bracelet can be set to launch video calls.
To set up the button to launch a video call:
Click on the dropdown menu below What to do when pressing.
Select Call a contact.
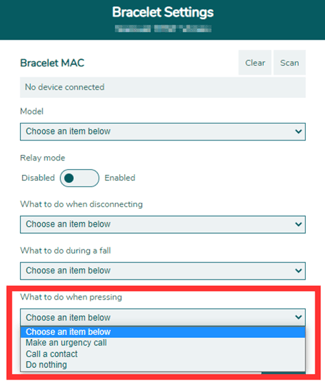
Click Save.
A contact needs to be set. If the patient already has one or more contacts in the aTouchAway® solution, click Set contact.
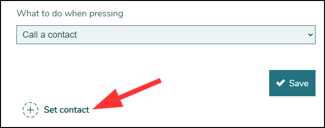
Choose a contact from the list under Available contacts.

If the patient does not have a contact in the aTouchAway® solution, the contact needs to be added first. Then, the contact can be set on the Bracelet Settings page.
Click Go back to patient's profile to return to the Bracelet Settings page.
The contact's name will appear at the bottom of the page.
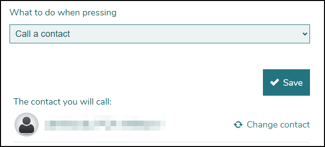
Click Save.
Wandering
The bracelet can be used to detect wandering if this option has been set up in the system.
To set up wandering action response:
Click on the dropdown menu below What to do when disconnecting.
Select either Show disconnected banner or Show wandering banner.
Click Save.
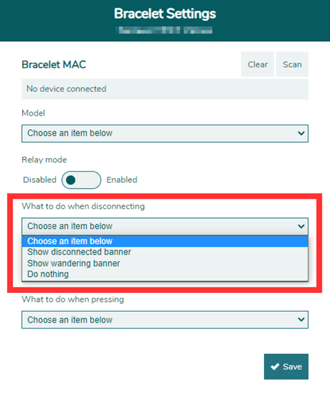
If the patient moves out of the range of the Bluetooth (which remains connected up to approximately 75 feet though walls, floors, and other obstructions may reduce the distance within which the tablet and bracelet remain connected), a 2-minute countdown will begin.
If the bracelet reconnects with the tablet within 2 minutes:
- no alerts or urgency calls are sent
If the bracelet does not reconnect within the 2-minute countdown:
- an alert will be triggered.
- depending on the bracelet settings, either a “Disconnect” banner or a “Wandering” banner will appear for the patient manager(s) to see
- an urgency call will be triggered if the urgency contact list has been set up for the patient
If the bracelet reconnects after the 2-minute countdown is over:
- the banner will appear for the patient manager(s) to see
- the urgency call will be cancelled
- the alert will still need to be cleared
Organizations with Multiple Bracelets on Site
For multi-patient facilities, Aetonix® can create a MESH network between tablets. In this situation, tablets in the facility can be set to connect with each other. This increases the Bluetooth coverage and keeps bracelets connected beyond the distance available to only one tablet.
Multiple Bracelet Setup Tips
If multiple bracelets are present at the location, it has been reported that the scan option sometimes detects the other bracelets used in the building that have already been connected to other devices.
A list of onboarded bracelet MAC addresses should be maintained for each facility / location.
If a list is maintained of these addresses, when a new device is being onboarded, the MAC address on the new device will not have been recorded yet. By comparing the list of previously connected devices, it should be possible to identify the new device that is to be connected as the MAC address would not appear on the list.
For instructions on how to set up an urgency contact list, please refer to Urgency Calls