Deactivating a patient's account will stop reminders and any Care Pathways. You can choose to remove any assigned managers, and it is the recommended action to remove the patient from your management lists in the aTouchAway® App.
Depending upon the implementation of your account, you will use one of two ways to deactivate patients. You will use one of these pages:
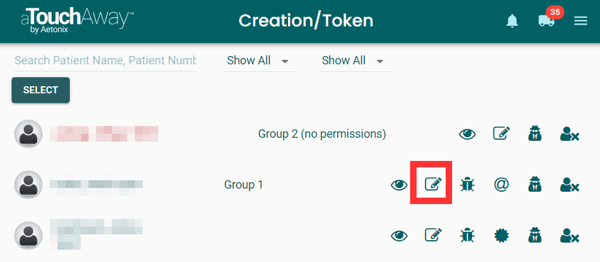
Creation / Token
On the aTouchAway® Dashboards under Patient Management, click Creation/Token.

Click the box under Patient active state. Select Patient is not active from the dropdown list. Click Save.
In the Inactive Warning pop-up window, check the boxes next to Remove Managers, Remove Contacts (recommended), and Stop Pathways. Clicking Remove Managers automatically checks Stop Pathways. Click Deactivate.

If you would like to maintain the data in the patient’s account for historical/reporting purposes, do not remove managers. The account will still be inactive, but the manager(s) will be able to access the patient's data from the aTouchAway® App. If you remove the managers, staff members who have the ability to log in to aTouchAway® Dashboards will be able to re-activate the patient and re-assign themselves as a manager to view the file at any time.
The names of inactive patients will be red on the Creation / Token page and will only have the icons applicable to Inactive patients to the right of their names.

OPTIONAL: Removing/Deleting the Patient Account
Clicking the "Remove from organization" button will remove your patient from the organization.
If the patient is a Mobile / Bring Your Own Device patient, the patient's account can be associated with another organization at a later time.
If the patient is an aTouchAway / Simplified patient (tablet), this action will trigger the permanent deletion of all their data.
Please make sure you want to PERMANENTLY DELETE the patient and ALL THEIR DATA before clicking this button. You will be asked to confirm you want to delete the patient. This action cannot be undone.
If you are unsure of how to proceed, please contact us BEFORE deleting.
To remove a patient, click the person with the X icon to the right of the patient's name. Click Remove Patient.

A confirmation window will pop up. Click OK to confirm removal of the patient or click Cancel to stop the process and return to the Creation / Token page.

Patients
In aTouchAway® Dashboards under Patient Management, click Patients.

Locate the patient to deactivate and click the box to the left of their name. Once the patient is selected, a pencil will appear to the right of the Patient State label. Click the pencil. If the Patients page is open in a narrow window, the pencil may appear below the Patient State label.

The Inactive button may be readily available to click, depending on the patient's current state. If the Inactive button is greyed out, the patient needs to be moved through the states until the Inactive button is available.
The patient states in which the Inactive button is available include: New, Active-Care, and Discharged.
The patient states in which the Inactive button is not available include: Consented, Waiting for Onboarding, and On-Boarded.
In the Inactive Warning pop-up window, check the boxes next to Remove Managers, Remove Contacts (recommended), and Stop Pathways. Clicking Remove Managers automatically checks Stop Pathways. Click Deactivate.

If you would like to maintain the data in the patient’s account for historical/reporting purposes, do not remove managers. The account will still be inactive, but the manager(s) will be able to access the patient's data from the aTouchAway® App. If you remove the managers, staff members who have the ability to log in to aTouchAway® Dashboards will be able to re-activate the patient and re-assign themselves as a manager to view the file at any time.
OPTIONAL: Removing/Deleting the Patient Account
Clicking the Remove Patient button will remove your patient from the organization.
If the patient is a Mobile / Bring Your Own Device patient, the patient's account can be associated with another organization at a later time.
If the patient is an aTouchAway / Simplified patient (tablet), this action will trigger the permanent deletion of all their data.
Please make sure you want to PERMANENTLY DELETE the patient and ALL THEIR DATA before clicking this button. You will be asked to confirm you want to delete the patient. This action cannot be undone.
If you are unsure of how to proceed, please contact us BEFORE deleting.
To remove a patient, click the 3-dot menu to the right of the patient's name. Click Remove Patient.

A confirmation window will pop up. Follow the instructions in the window to remove the patient or click Cancel to stop the process and return to the Patients page.

Reusing the Tablet and Other Equipment
To reuse the aTouchAway® tablet and other equipment, you'll need to create and add a new patient to your organization, follow the instructions found here:
Setting up the aTouchAway® Tablet using the aTouchAway® App