To start or stop a Pathway, and to view Pathway data, you must be assigned as a manager for the patient. For more information about assigning managers see Assigning Direct Patient Managers.
Step 1: Open the Patient Overview
To start a Pathway from the aTouchAway® Dashboards, you will need to access the Patient Overview. Use one of the following methods to access this page. Your access may depend on your organization, your role, or your permissions.
Method 1. Use Health Overview
On the aTouchAway® Dashboards under Live Monitoring, click Health Overview.

Find the patient for whom you would like to start the Pathway. You can use the filters and / or the search bar (search by patient number or health card number) to assist in locating a specific patient. Click on the patient's name to access the Patient Overview.

Method 2. Use Creation / Token
On the aTouchAway® Dashboards under Patient Management, click Creation/Token.

Find the patient for whom you would like to start the Pathway. You can use the filters and / or the search bar (search by patient number or health card number) to assist in locating a specific patient. Click on the eye icon to the right of the patient's name to access the Patient Overview.

Method 3. Use Patients
On the aTouchAway® Dashboards under Patient Management, click Patients.

Find the patient for whom you would like to start the Pathway. You can use the filters and / or the search bar (search by patient number or health card number) to assist in locating a specific patient. Click on the 3-dot menu to the right of the patient's name. Click Patient Overview to access the Patient Overview.

Step 2: Start a New Pathway
From the Patient Overview, select the Pathway tab and then click on +Start a new pathway.
If you don't see the Pathway tab, this means that you are not managing this patient. Be sure to set yourself up as the patient's manager.

Choose your Pathway from the drop-down menu.

Fill in the Pathway details:

Pathway Label: This label will appear on any screens that display in the patient's aTouchAway® App. This label is optional.
Pathway Actors: Adding your Care Team members will give them access to the Pathway data in their aTouchAway® App. Alerts related to the Pathway will show up in their aTouchAway® App and Dashboards.
- Include one or more Patient Groups from the dropdown field to apply Patient Group managers and permissions.
- Manager Actors (who are patient managers) will appear in the drop-down list. Use this field to add specific managers as opposed to managers connected through the Patient Group settings. If your actor is not on the list, be sure to add them as a manager.
You can add additional Pathway Actors by clicking on the +Add button. To remove an Actor who has already been added, click the X to the right of the dropdown menu field.

Demo Mode: Putting the Pathway in demo mode allows you to preview what the patient will see in their aTouchAway® App. Demo mode shortens the day to a few minutes (details are shown on the screen when you set the mode). Ensure that you turn demo mode off for actual patient monitoring.
Setting the time for questionnaires to appear: Choose the time of day that Pathway specific questionnaires should appear on the patient's aTouchAway® App. These questionnaires will include predetermined questions and prompts to take Pathway specific vitals.
Vitals Entry Mode: Choose whether you want the patient to add their vitals through manual entry or by using a paired device.
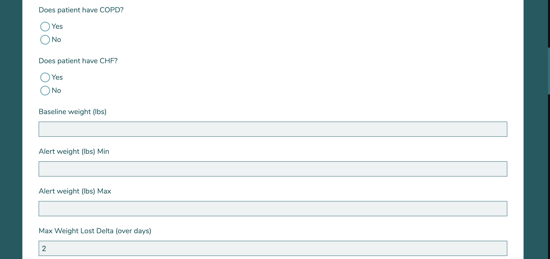
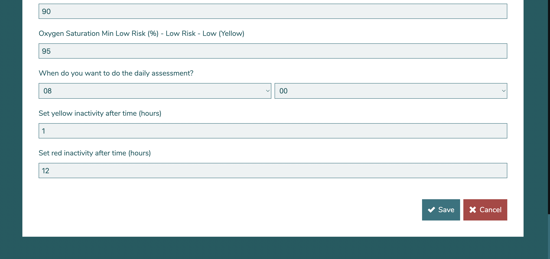
The remaining Pathway details will be unique to the Pathway you are using. You may be asked to set thresholds, select the health data that you'd like to collect, or set other items pertinent to your patient's care.
Once you've completed the form, click Save. This will start the Pathway for this patient.
Once your Pathway is started, it will appear on the Patient Overview page under the Pathway tab and beneath Ongoing pathways.
